The gastrocnemius is one of the most easily visible muscles in the human body—the structure that gives the calf its characteristic bulging shape. It is this shape that inspired the name of the muscle: “belly of the leg,” from the Greek gaster (belly) and kneme (leg).
The gastrocnemius is a two-jointed muscle, with two halves, or heads—one medial (Image 1A) and one lateral (Image 1B)—that originate at the femur at the back of the lower thigh. Beneath it lies the soleus muscle (Image 1C), which holds the real strength and power in the calf. These two muscles help you to stand, walk, run, and rise up on the balls of your feet. Both are attached to the back of the calcaneous by the Achilles tendon (Image 1D). In this article, we will focus on the gastrocnemius muscle, which is injured a bit more often than the soleus.

Images 1A–1D
How and Why These Injuries Occur
Picture yourself walking around on the ball of your foot, unable to put your heel down. That’s what you would look like if you had a severely strained gastrocnemius muscle. The story I hear most often from people with this injury goes something like this: “I got this pain in my calf a week ago while I was playing ball. I just thought it would go away, so I kept on playing. Now I can’t put my heel down when I walk most of the time. It hurts too much.”
Alternatively, a gastrocnemius muscle tear can happen suddenly, with a snap. A client might say, “It felt like somebody hit me with a racket across my calf, but when I turned to see, no one was there.”
For a person with this injury, walking is uncomfortable and any greater exertion may cause pain. When pain is extreme, there can be a tear in the muscle so wide that it leaves a half-inch gap you can feel when you run your finger over the calf. In these cases, simply standing with the heel down is excruciating. Usually, though, the fibers are torn only microscopically and the person can stand without pain; it’s being more active that makes it hurt.
While it’s typical for just one head of the muscle to be torn, occasionally both are injured simultaneously. The pain can be felt medially or laterally, or in both places, and is perceived as occurring somewhere near the surface, rather than deep inside the calf. In chronic cases that have healed poorly, the injury gets alternately better and worse. The worst bouts of pain may last as long as six months, because it’s difficult to function without walking, yet walking keeps re-injuring the torn fibers.
To understand why and how the calf became strained in the first place, you need to look at the total picture—including the person’s full body alignment, habitual movement patterns, type of work, and so forth. For example, in an individual with a forward-head posture, the weight of the body is transferred forward, placing more strain on the calf muscles. To get a sense of this, try standing up and moving your head forward about 2 inches. Notice what happens to the stress in your calf muscles. If you’re able to analyze the underlying cause(s) of the injury, you can help the client take steps so that it doesn’t happen again.1
Often, there are multiple causes of this type of injury. Apart from body use and alignment, other common contributing factors include excess muscle tension in the lower legs, lack of calf flexibility, inadequate warm-up before workouts, and general fatigue in the legs—particularly when any of these is combined with overexertion.
Injury Verification
One sure sign of this injury is that the client can’t stand with the leg straight and the heel on the ground, and can only walk on the ball of the foot. When sitting, the person can flex the foot much more easily with the knee bent than with it fully extended. If the pain is so bad that the client can’t put the heel down on the ground while standing, perform Test 2 instead of Test 1.
Test 1. Heel Raises (Standing)
Perform this test only if the client’s pain is mild to moderate (not severe). Have the person stand with the feet parallel and knees straight, and then rise way up onto the balls of the feet (Image 2). Be sure that the client’s knees stay straight. When the knee is bent, the gastrocnemius relaxes and the soleus muscle does most of the work. If there is no pain, do the same test standing only on the injured leg. In the case of a gastrocnemius injury, this test will cause pain. Tell the client to stop and bring the heels back down as soon as pain is felt, which may occur after rising up only an inch off the ground. You’re testing to determine whether there is pain, not how bad it gets.

Image 2: Heel raises
Test 2. Resisted Plantar Flexion (Supine)
For individuals who have severe pain, use this test instead of the standing heel raises. Place your fist or palm under the metatarsals with the foot in partial dorsiflexion (Image 3). Ask the client to try to plantar flex the foot, moving very gently in case there is a severe tear. As soon as pain is felt, stop the test; you have the information you need.

Image 3: Resisted plantar flexion
Treatment Choices
Self-Treatment
No matter how mild the injury, have the client rest and take care not to return to full activity too soon. Throughout the healing process, it’s important to keep the heel elevated. This puts the gastrocnemius into a relaxed position so that it does minimal work while the soleus takes over. The person either can wear heeled shoes or boots all the time, or else can purchase some felt or moleskin (available from drugstores) and make a thick pad to fit in the heel area of each shoe. This method only works if the pad can be thick enough so that standing and walking no longer cause pain. Depending on the extent of the injury, it may be necessary to use as much as 1–11⁄2 inches of padding (not easy to do in most shoes). The two heels should be elevated equally, so the body isn’t lopsided.
Icing the calf repeatedly throughout the day may also be helpful. From a sitting position, have the client apply ice or a cold pack to the affected area for 10 minutes or so and then alternately flex and extend the foot. At first, the knee may be slightly bent if necessary to do the exercise without discomfort. (No pain should be felt during these movements.) The goal is to be able to comfortably extend and flex the foot with the leg, almost or entirely straight within a week or so.
When the calf is feeling better, have the client perform the following rehabilitative exercises, two or three times a day. It’s important to keep moving so that scar tissue doesn’t form where it shouldn’t. Movement during healing helps cut down on adhesive scar tissue formation and helps the muscle stay flexible.
Friction Therapy and Massage
In moderate cases, friction therapy and massage, combined with the self-treatment measures already outlined, will speed healing and help minimize scar tissue formation. However, in cases of recent injury with severe pain, a doctor should be seen and treatment should not commence until three or four days after the injury.
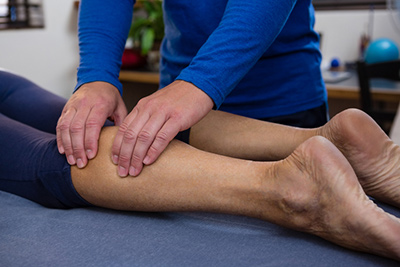
Friction therapy of the gastrocnemius muscle is performed with the person lying in a prone position. Place three or four fingertips over the area of pain, press anteriorly, move with moderate force through the muscle fibers at a 90º angle, and then drag back to the starting position. Repeat this friction movement continuously for 5–6 minutes. Take a break for a minute or so and do the same thing again. You know you are using the right amount of pressure if the client feels mild, annoying discomfort, not pain. After performing the friction therapy, apply effleurage massage to the calf, posterior thigh, foot, anterior thigh, and shin to increase circulation throughout the entire limb.
Stretching
After two weeks of hands-on treatment, gentle stretching should begin, provided that it can be done without pain. This allows for continued healing in the presence of a full range of motion. Start by performing assisted stretches on the gastrocnemius muscle (Image 4). While holding the heel with your fingers, have the person actively pull the toes toward the knee as far as possible. Then, using your forearm, gently take him or her a bit farther for up to 2 seconds. Do not hold the stretch at the end; instead, move slowly and gently, in a continuous motion. When you have completed the stretch, ask the person to extend the foot and repeat the process 8–10 times. Then, have the person evert the foot and perform the same stretch 8–10 times. Finally, repeat with the foot inverted. This gets all the different fibers to participate in the stretching action. (This method of stretching is taken from the Active Isolated Stretching method developed by Aaron Mattes.) After doing this successfully in a few sessions, teach the person how to do the same thing by himself or herself on a daily basis, using a rope or strap of some sort.

Image 4: Stretching the gastrocnemius
Strengthening
After the acute pain has subsided and the person can walk without discomfort, initiate a strength program for the calves. Start with heel raises on both feet simultaneously, with more weight placed on the good leg if sharing the weight equally is too stressful on the injured leg. Over a few weeks, have the client transfer more and more weight to the injured leg until the heel raises can be performed on the injured leg only.
Once the person can perform three sets of 10 heel raises on both legs without pain or fatigue, begin to vary the exercise. Use three different angles—feet parallel, turned slightly inward, and turned slightly outward—with 10 repetitions in each position, for a total of 30. When the client can do these variations easily with the knees straight, add all the same exercises done with the knees bent. That makes a total of 60 reps. In the final stage, the client then repeats this same set of exercises with the balls of the feet on a step, so that the heels can go below the forefoot. This enables the gastrocnemius to move through its full range of motion as it increases in strength.
A Straightforward Path to Healing
Once you have a solid understanding of gastrocnemius injuries, they are relatively easy to assess and treat. There are just a few important principles to remember. As mentioned earlier, be sure to have the person see a physician and wait at least three days after the injury has occurred to gently begin treatment. This allows the initial healing to take place without interference. Emphasize the importance of keeping the heels elevated, so the gastrocnemius muscle can relax. Also work to ensure that the client moves the calf through a full range of motion, on a daily basis, in order to maintain full flexibility and help prevent future injuries from occurring. With proper self-care and appropriate treatment, most gastrocnemius muscle tears can heal within 4–6 weeks.
Ben E. Benjamin, PhD, holds a doctorate in education and sports medicine. He is founder of the Muscular Therapy Institute. Benjamin has been in private practice for more than 45 years and has taught communication skills as a trainer and coach for more than 25 years. He teaches extensively across the country on topics including orthopedic massage, Active Isolated Stretching and Strengthening, SAVI communications, and ethics, and is the author of Listen to Your Pain (Penguin, 2007), Are You Tense? (Pantheon, 1978), and Exercise Without Injury (MTI, 1979), and coauthor of The Ethics of Touch (Sohnen-Moe Associates, 2003). He can be contacted at 4bz@mtti.com.
Note
1. There are trainings available that enable massage therapists to become experts in this kind of analysis. For information, visit www.goprimalfitness.com.
Editor’s note: Massage & Bodywork is dedicated to educating readers within the scope of practice for massage therapy. Essential Skills is based on author Ben E. Benjamin’s years of experience and education. The column is meant to add to readers’ knowledge, not to dictate their treatment protocols.


